
"2024 Approved Illuminating Colors The Grader's Journey"
Illuminating Colors: The Grader’s Journey
Everyone in the video editing world is full of lively and beautiful colors — just like the world we live in every day. But, if you’ve ever shot any film on a smartphone or a digital camera, you’ve probably observed the colors you see in real life don’t always match up to what you want to see on your screen. In this article, you will grasp how and when to use the color grading process by stylizing the color scheme of your footage and its importance in your everyday film and video projects.

What is Color Grading?
Color grading is the video editing process wherein grading (arranging) colors in a video or film to give them a stylistic look. It is different from Color correction because color correction is the process of correcting (fixing) colors in a video or a film as a way to get them back to what they should look like for your project or output.
In cinematography, color grading refers to the manipulation of film and video images to create consistent color tones throughout a motion picture. Many filmmakers use a color palette or preset as part of their overall production plan. These palettes represent artistic choices that provide the film with a cohesive general aspect. When film footage does not adequately match these color palettes, directors and colorists use digital color grading tools to change video colors as needed.
Color grading and color correction are processes that happen throughout postproduction. One makes the film look more native, and the other stylizes the footage. After the colorist finishes color correction, they can begin grading the film. During color grading, colorists use editing software to formalize the footage, highlighting a movie’s visual tone and ambiance and making it look more cinematic.
To summarize, Color grading can be used to make both technical and creative changes. Colorists use color grading for artistic purposes to ensure that the film’s carefully curated color palette conveys a specific atmosphere, style, or emotion.
Why is Color Grading Important?
Color grading establish a picture’s first impression
Most images are initially seen as rushed by in one of the infinite scrolls that fill social media or in small thumbnails in galleries. In these circumstances, perfect skin retouching or flawless exposure means very little. Users do not even recognize the image in enough detail with these varieties of an object. Color grading, however, stands out within the condition of these formats. An excellent color-graded image that implores the viewer will drive them to stop and take a closer look. As a photographer, you need support in learning how to grade your ideas so that they will grab viewers’ attention in a fleeting second among the chaotic noise of the digital age.
It communicates the atmosphere to tune with the scene
The communication of emotion and story through the lens is one of the most powerful tools a photographer has at their disposal. The grading of a well-graded image can often augment the sense of story within a scene or even completely transform it. Without the grading, an image may look flat, boring, or even disjointed. As a photographer becomes more proficient at grading, he or she can leverage the power of color tone to influence emotional tone within a scene. Grading at this level can transform an unexciting frame into a moment of cinematic magic.
Color grading encourage a style that can be completely your own
One of the most intimidating challenges a photographer or vlogger faces is creating a unique style that can result in a brand for their work. Making a visual style that viewers can recognize at a glance can tremendously impact the growth of a photographer’s career. Color grading plays a vital part in that process. Customers will often come to you with a wide range of different photography outputs. By defining a consistent color grading work, you can tie it all into a dense brand that reflects strongly on you and construct a distinctive value that provides you something to sell that only you can offer to people.

How to use Color Grading in Wondershare Filmora?
There are many color grading software available on your Windows PC or Mac. Still, here I will show you how to use the Color grading and color tuning features in Wondershare Filmora video editing software. Filmora’s natural interface allows learners or semi-pros to master this video editor speedily. And, the color tuning tools in Filmora are powerful enough.
Multiple professional color correction/grading software options are available on the market. Acceptable examples include Red Giant Colorista, although both are difficult to use and their relatively high price. Wondershare Filmora is the software we strongly recommend, as, with this tool, you can make your video cinematic within a few clicks. Unlike the competition, Wondershare Filmora is easy to use and includes some great features.
Kindly see the details and steps on how to engage in color grading and color correction in post-video creation with Wondershare Filmora:
Step1Install Wondershare Filmora
Then select the New Project to create a new project file and click Import to find and load your videos in local folders or portable media devices to the local media library. This software also allows you to add files with drag and drop. Then put them on the timeline.
Step2There are 2 ways to color your video in Wondershare Filmora
Advanced Color Tools icon – click the Advanced Color Tools icon in the toolbar to enter the advanced color tools window, where you can apply the preset templates or adjust the color coarsely. It is suggested to start with Presets for beginners, which will save you much time.

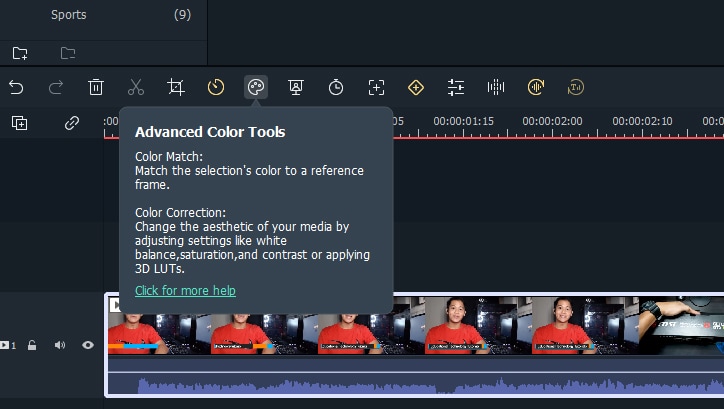
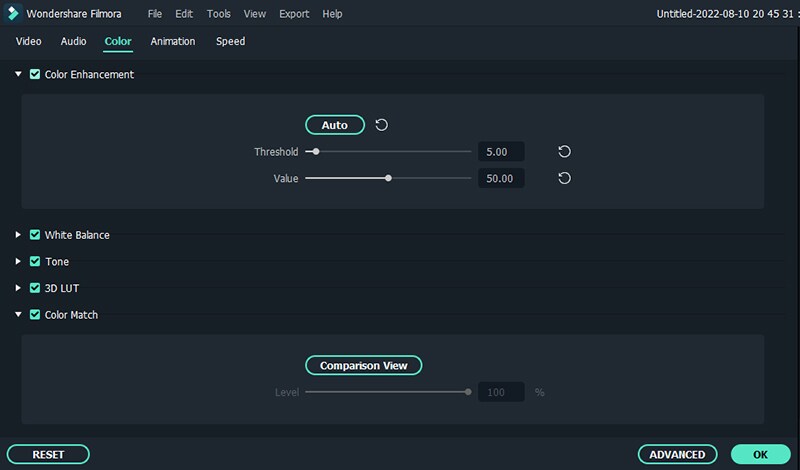
Color Panel Window - to perform color correction in Wondershare Filmora, switch to the Color tab. You can modify the white balance, saturation, tint, contrast, temperature, and brightness and apply 3D LUT immediately and quickly in this editing panel. You see the output in the Preview window.
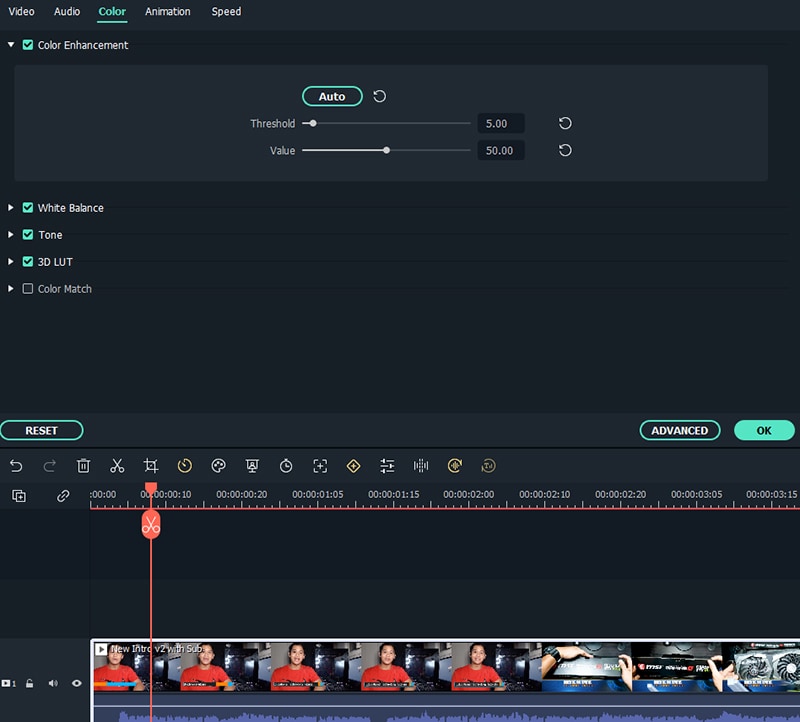
Contrast: is the variance in luminance or color that makes an object identifiable. By modifying this setting, control the dissimilarity in color and brightness in contrary parts of the video image.
Saturation: This setting constitutes the amount of gray in proportion to the hue. You can adjust it to make the entire video image’s colors look soaked or unnoticeable.
Brightness: You can change this setting to reorganize your video image’s overall lightness or darkness.
Tint: Tint cites the light of a color. For example, when rede is saturated with white, it will create a shade of pink.
3D LUT: The 3D Lookup Tables in Filmora allow you to employ Hollywood film-looking color sets for your video.
Using the Advanced Color Tools
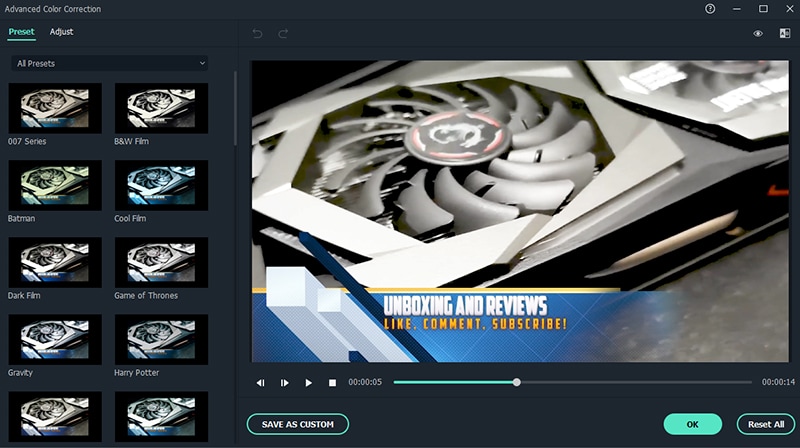
Step1Choose The Color correction
Here, there are two options to select: The Color correction. It offers different readily-made presets you can use to color your video.
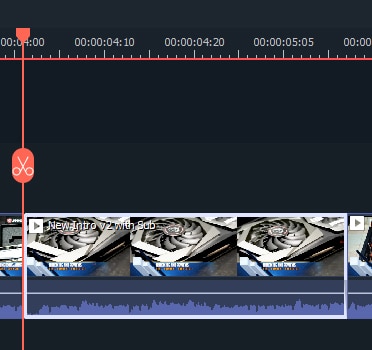
Step2Select the specific video portion
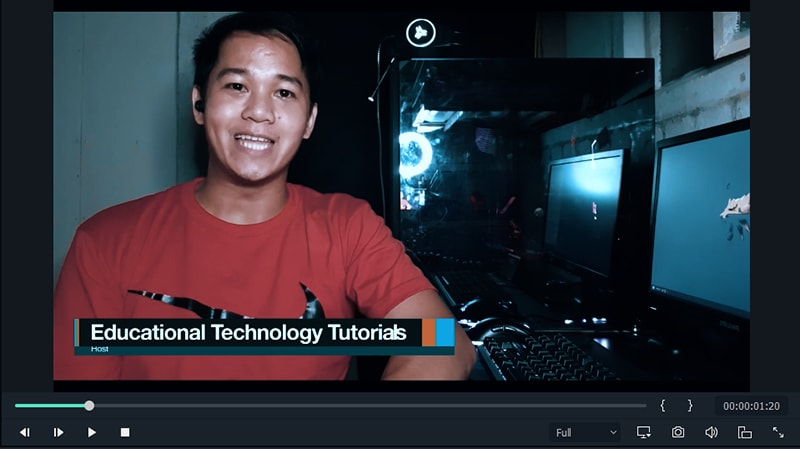
First, you need to select the specific video portion you want to change the color. Just click the scissor icon or what we call split tool. In this case, I split the 2nd video when I zoom in on the subject.
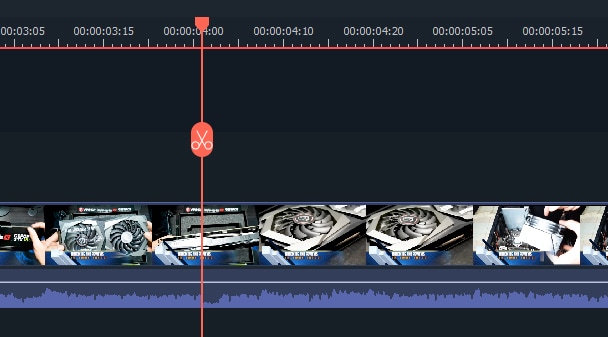
- And I selected the end portion of the video. After that, choose the part of the video.
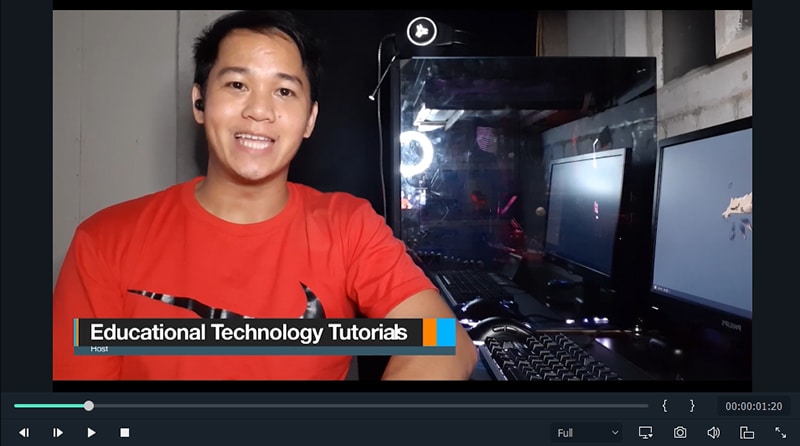
Step3Apply the color correction preset that you want then click ok

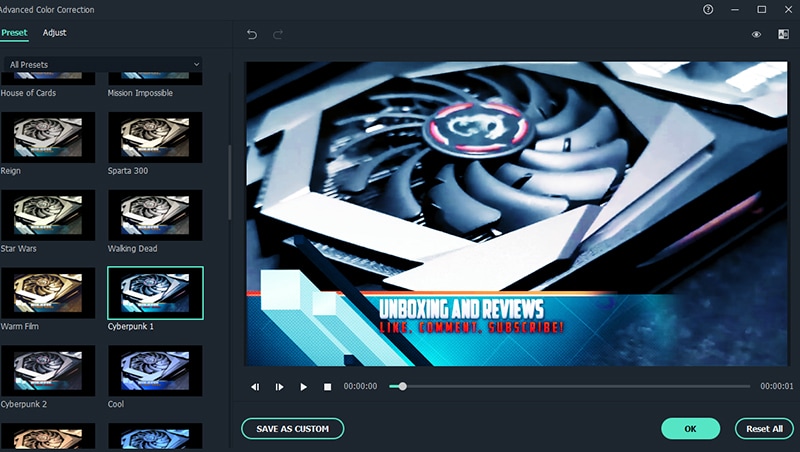
You will notice that the color changes depending on your selected preset.
In the Presets tab, there are different templates, including Common, 3D LUT, Vignette, and Film. While in Adjust tab, you can modify the white balance, such as color tint and color temperature, 3D LUT, Color, Light, HSL, and Vignette, etc.
Step4Preview and save your new video
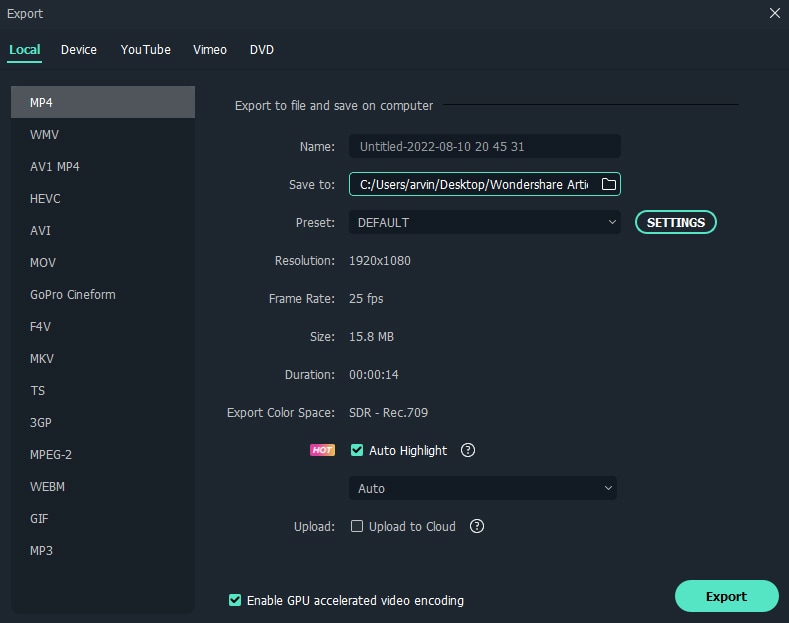
Once you’ve finished correcting the video color, press Play and go over the whole video through the previewing window. If satisfied with the result, click the “Export” button to transport your video. Click the Settings button to modify settings if needed. You can save the new videos in different formats under the Format tab. If you want to play the edit file on devices like Tablet, iPad, Kindle Fire, PSP, Xbox, etc., go to the “Devices” tab and select the configured preset for the specific model. You can also upload the video output on Youtube for better preservation.
 NeoDownloader - Fast and fully automatic image/video/music downloader.
Using the Color Panel Window
Step1To perform color correction in Filmora, switch to the Color tab
You can modify the temperature, tint, white balance, contrast, saturation, and brightness and apply 3D LUT directly and quickly in this editing panel.
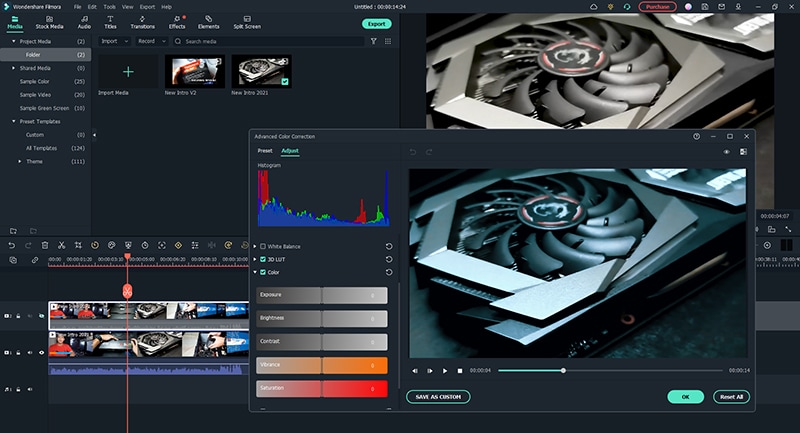
Step2Color grading with Wondershare Filmora
Click the button Advanced at the lower corner, then the color grading window will pop up, and you can explore your settings and options.
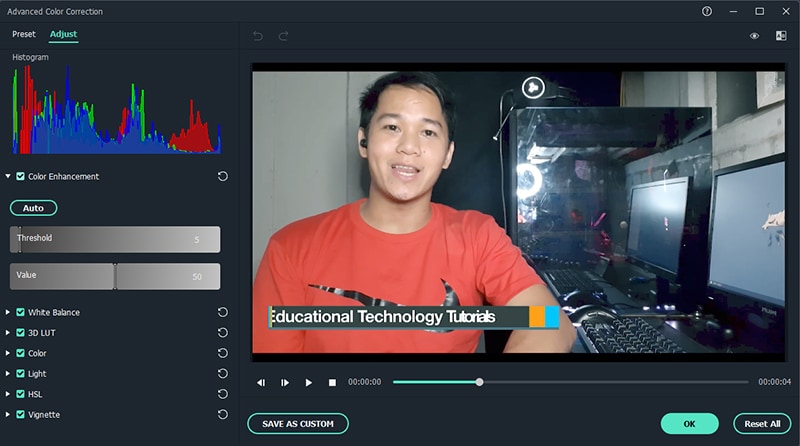
Color Histogram
The color histogram informs you of the color condition of this video. This reflects the exact allotment of colors throughout a specific image, highlighting the various colors on the screen and the pixels for every color type. When the color histogram points out as “Three Color Histograms,” a specific assignment of the three primary colors (R, B, and G) is reflected.
White balance
You can modify the white balance of this video clip here. This allows you to change how intense each color appears in the video. This is important since white balance enables you to depict images realistically. According to the different intensities of the colors, you can get a much-differentiated outcome in terms of realism.
Vignette
It is a French word that initially meant the borders of a book. This process allows the center of the image to appear clear and the edges much fader. In other words, if you wish to focus on the middle of the video and blur the rest, you will need this effect. In this way, you can emphasize what is essential and let the other details disappear into the background.
Color and light
In the Color and Light section, you can adjust the Exposure, Brightness, Contrast, Saturation, Vibrance, Highlights, Shadows, Whites, and Blacks.
3D Look Up Table
3D LUT is part of the digital middle process. They are mainly used for you to compute how the video will be displayed on various screens and devices. The color space is precisely calculated and mapped to be projected precisely as you would desire. There are, of course, a lot of 3 Dimensional effects allowing you to transform the image of your video as promised.
HSL
HSL is the acronym for hue, saturation, and luminosity. It is cylindrical geometry, where you mix the different colors and adjust their intensities to get the accurate mix you are eyeing for in your video. You can select whether you want the video to arise lighter or darker, getting the right mix of colors every time.
In the HSL section, you can enhance the corresponding color in the video.
Step3Save and export your work
To view the output, you can compare the video before and after color grading in the A/B comparison view. You can eventually save the color grading setting created as a preset and utilize it. If the result is good, click the Export button to upload it to YouTube or Vimeo, Save it as MP4, MKV, WMV, etc., or burn it into DVD.
Tips: To enter the Advance Color Correction setting, you can select the clip in the timeline and click the Color Tuning icon in the toolbar.
I hope the mentioned information helps you understand the distinction between Color correction and color grading and creating stunning, excellent videos in Wondershare Filmora with the Color Tuning tools.
Overall, Color grading is the process of video editing to have an excellent look to help make a video feel more vigorous and stylistic and can define color assessment. Color correcting is the process of editing a video or film to fix any variances in the color so it can display how the viewers are meant to see it.
Free Download For Win 7 or later(64-bit)
Free Download For macOS 10.14 or later
- Title: 2024 Approved Illuminating Colors The Grader's Journey
- Author: Jeffrey
- Created at : 2024-08-21 09:14:18
- Updated at : 2024-08-22 09:14:18
- Link: https://some-knowledge.techidaily.com/2024-approved-illuminating-colors-the-graders-journey/
- License: This work is licensed under CC BY-NC-SA 4.0.