
In 2024, Impart Rotational Luminosity Modification in Photoshopping
Impart Rotational Luminosity Modification in Photoshopping
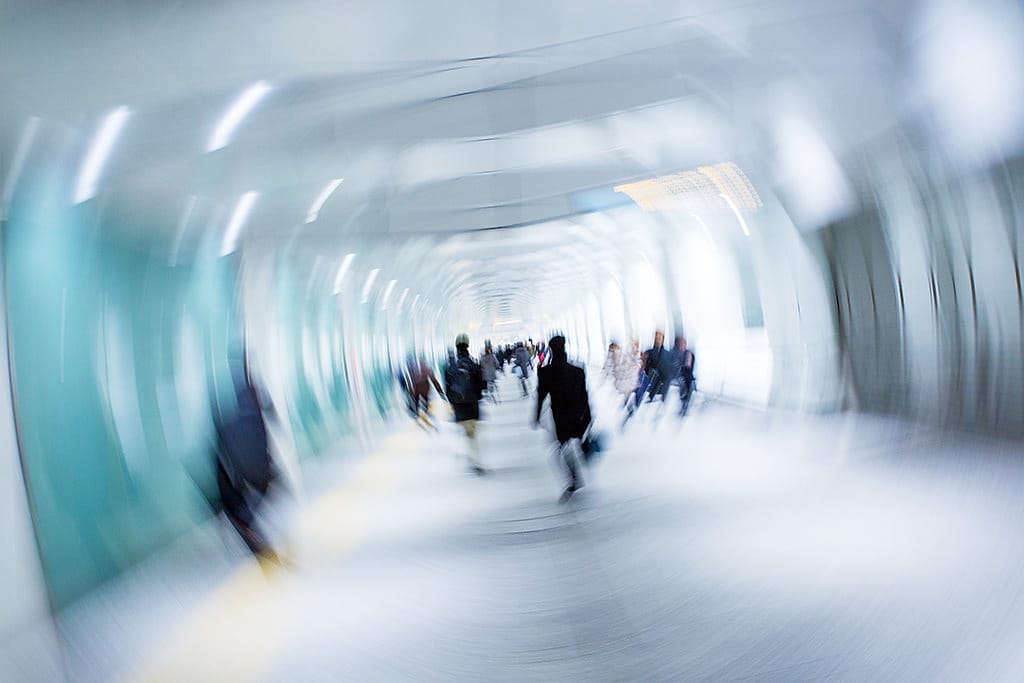
Have you ever seen radial blur pictures? To add a sense of speed to still images, many creators like to add a radial blur effect to their photos. It instantly increases the dramatic effect of the captured pictures. Moreover, if you are taking photos of fast-moving objects, the radial blur effect can be advantageous in making the picture more appealing.
If you are unaware of the radial blur effect, this article can act as a guide. Through this article, you can learn how to add radial blur in Photoshop with the help of simple instructions.
Part 1: What is a Radial Blur Effect?
The radial blur effect is somehow similar to motion blur. This effect can be created at a slow shutter speed in the camera, or you can move or rotate your cameras in certain ways to create this effect. Many photographers also create a motion blur effect by zooming in at a slow shutter speed. By adding this effect, you will create a tunnel vision in your photos.
Moreover, the radial blur effect can also evoke certain emotions by transforming the image. To create this effect, you have to be precise and accurate with your camera movements. Hence, you can bring focus and display a certain speed in your photos using the radial blur effect.

Part 2: How to Add the Radial Blur Effect to Your Photos in Photoshop?
To craft a radial blur image, many individuals prefer using Adobe Photoshop . The main reason behind the immense popularity of Photoshop is its polished and well-design interface. Along with an intuitive interface, it also consists of various AI-supported features. You can use its color grading tools to manage the saturation, brightness, hue, and contrast levels of your photo. Moreover, you can also add layers to your photo if you want to bring extra dynamics.
Photoshop also allows you to use its pre-built filters for further modifications. With a single tap, you can apply filters to the photos without making them look artificial or low-quality. Moreover, you can also perform basic photo editing by utilizing the options such as cropping and resizing. Apart from all these distinct features, Photoshop also enables you to add a radial blur effect to the pictures.

Steps to Create Radial Blur Effect in Photoshop
Are you eager to learn how to create radial motion blur in Photoshop? Keep reading this part of the article to find accurate instructions to craft radial blur effects in Photoshop:
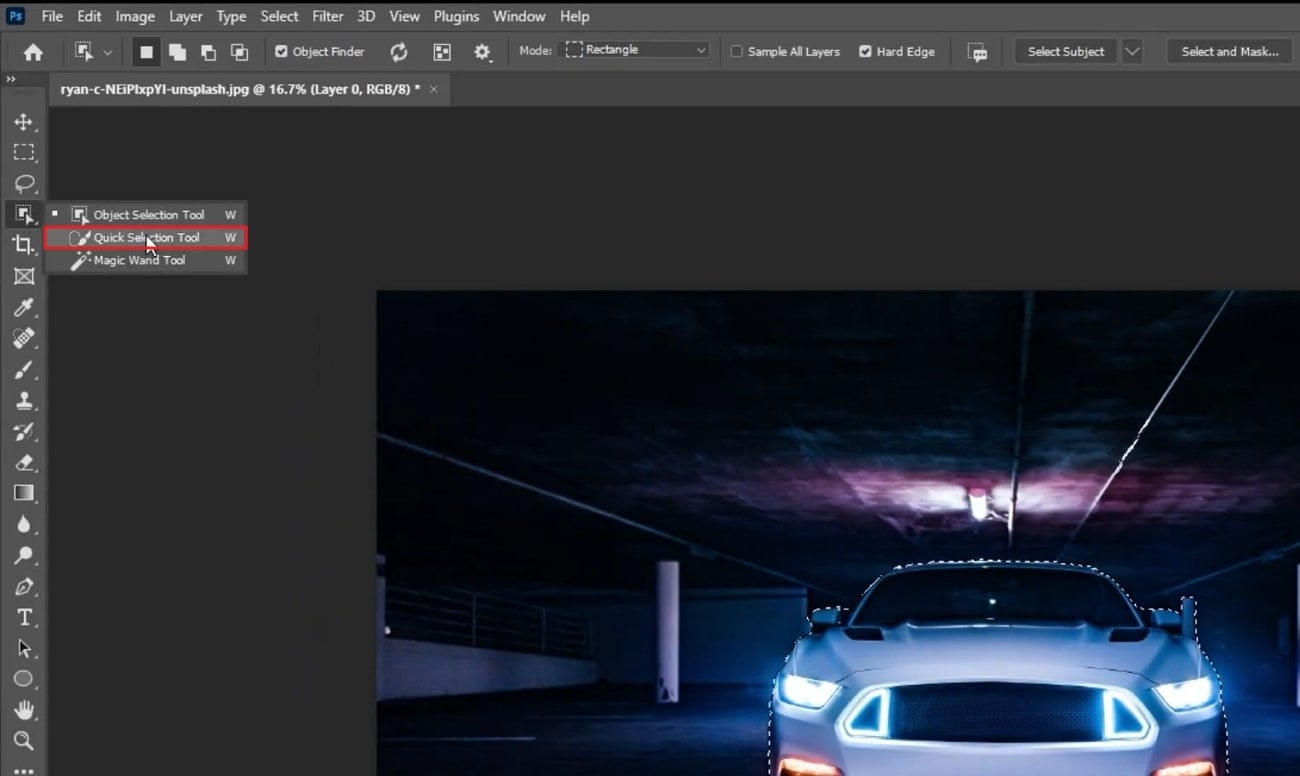
Step1 Open your Photoshop tool and upload the image that you want to edit. Click on the brush icon from the right side and tap on the “Object Selection Tool.” Now draw the selection around the subject in your image and refine it by using the “Quick Selection Tool.”
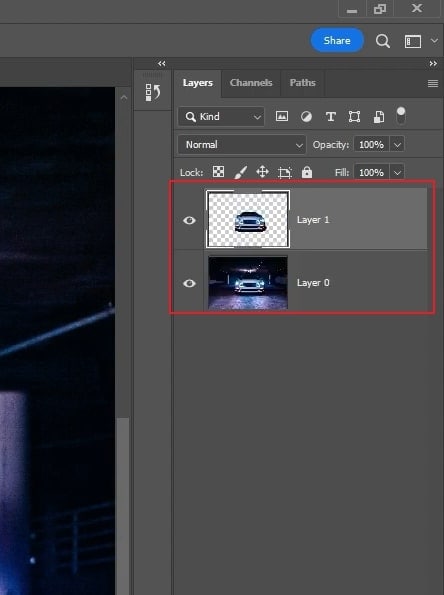
Step2 To refine the selection, use the Alt key from your keyboard. Once done with the refinement, press “Ctrl + J” to copy the new background layer. To create the background layer on Mac, hit the “Command + J” combination.
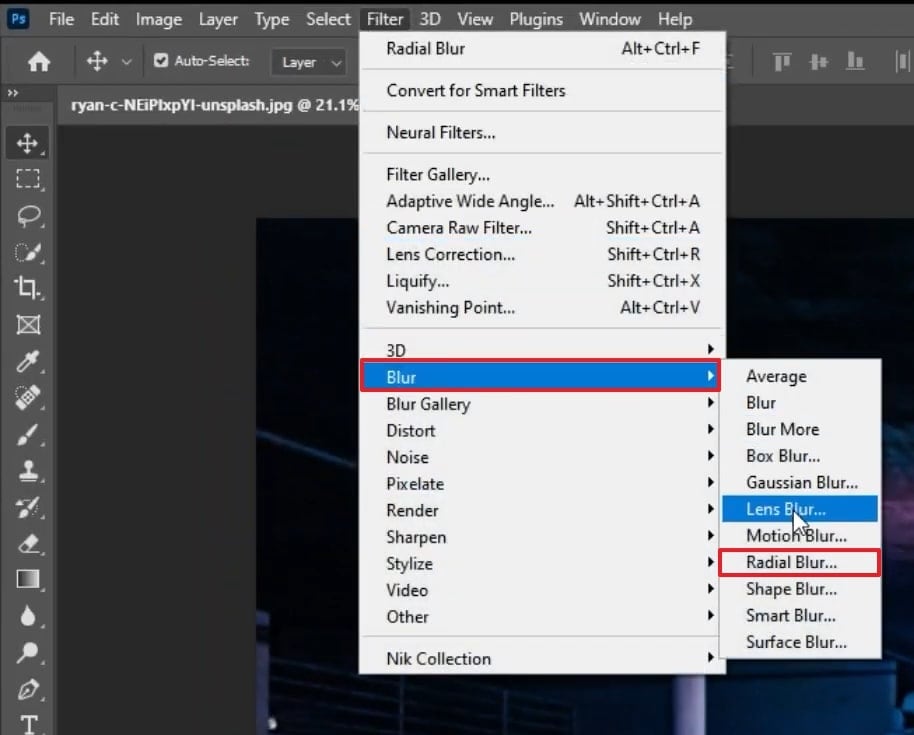
Step3 Afterward, click on the background layer and head to the “Filter” tab. From there, select “Blur” and tap “Radial Blur” from the drop-down menu. Adjust on the Radial Blur window by choosing “Zoom” as Blur Method. Also, select “Best” under the Quality section. Once done, adjust your Blur Center from the window.
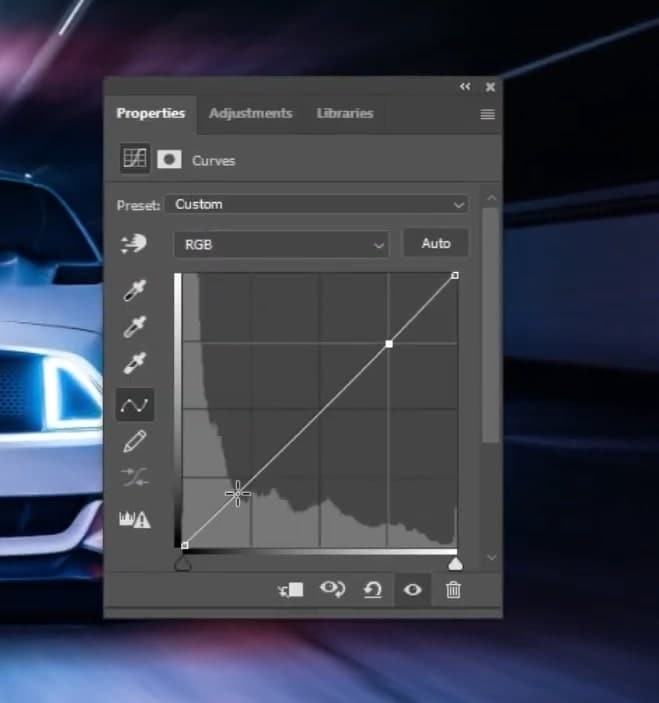
Step4 After making all the adjustments in the Radial Blur window, press the “OK” button. Once done, select the top layer and add a “Curve Adjustment Layer.” Now adjust the curve properties according to your preference. Thus, you can see the radial blur effect on your photo on your screen.

Bonus Tips – The Alternative to Photoshop to Create Radial Blur Effect
Are you finding it challenging to create a radial blur in Photoshop? If yes, there is no need to worry, as we will provide you with the best alternative to Photoshop. The best available tool that offers high-end effects and other functions in a friendly interface is Wondershare Filmora . This tool can make your editing experience delightful and extremely simple.
Free Download For Win 7 or later(64-bit)
Free Download For macOS 10.14 or later
For photo and video editing, Filmora provides several features such as Split Screen, Speed Ramping, Auto Reframe, Motion Tracking, etc. To capture your on-screen activities or video meetings, this tool also provides you with a Screen Recorder.
When it comes to effects, Filmora provides tons of vibrant effects such as Boris FX, Chroma Key, Mask and Blend, NewBlue FX, etc. Besides being a great photo and video editor, you can use this platform to edit and alter audio clips.

WPS Office Premium ( File Recovery, Photo Scanning, Convert PDF)–Yearly
Steps to Create Radial Blur Effect Using Filmora
Creating a radial blur effect in Filmora is extremely simple and easy. Its intuitive interface allows you to add a radial blur effect instantly with a few clicks. For your convenience, we have mentioned precise and authentic instructions below to create a radial blur effect in Filmora:
Step 1 Add your Photo
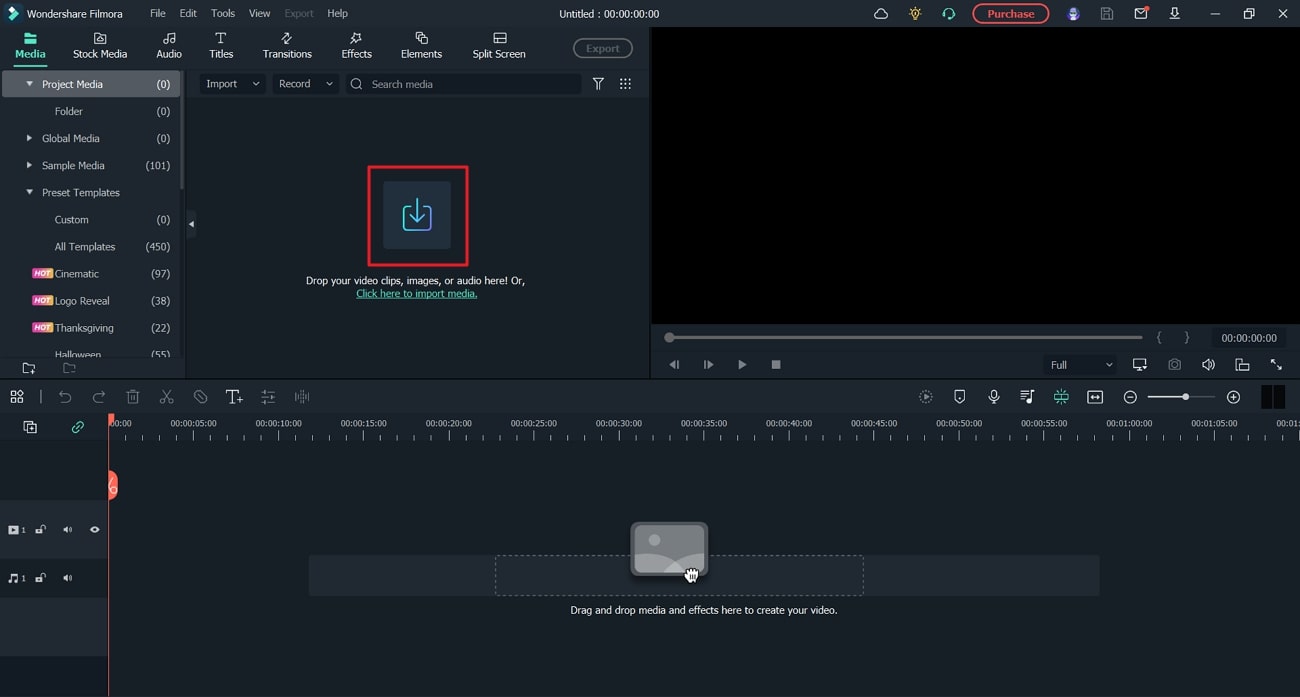
Begin by launching Wondershare Filmora on your PC. Afterward, tap on the “Create New Project” button to open a new window. Hit the “Arrow” button and import the photo into the project media.
 ZoneAlarm Pro Antivirus + Firewall NextGen
Step 2 Add the Required Effect
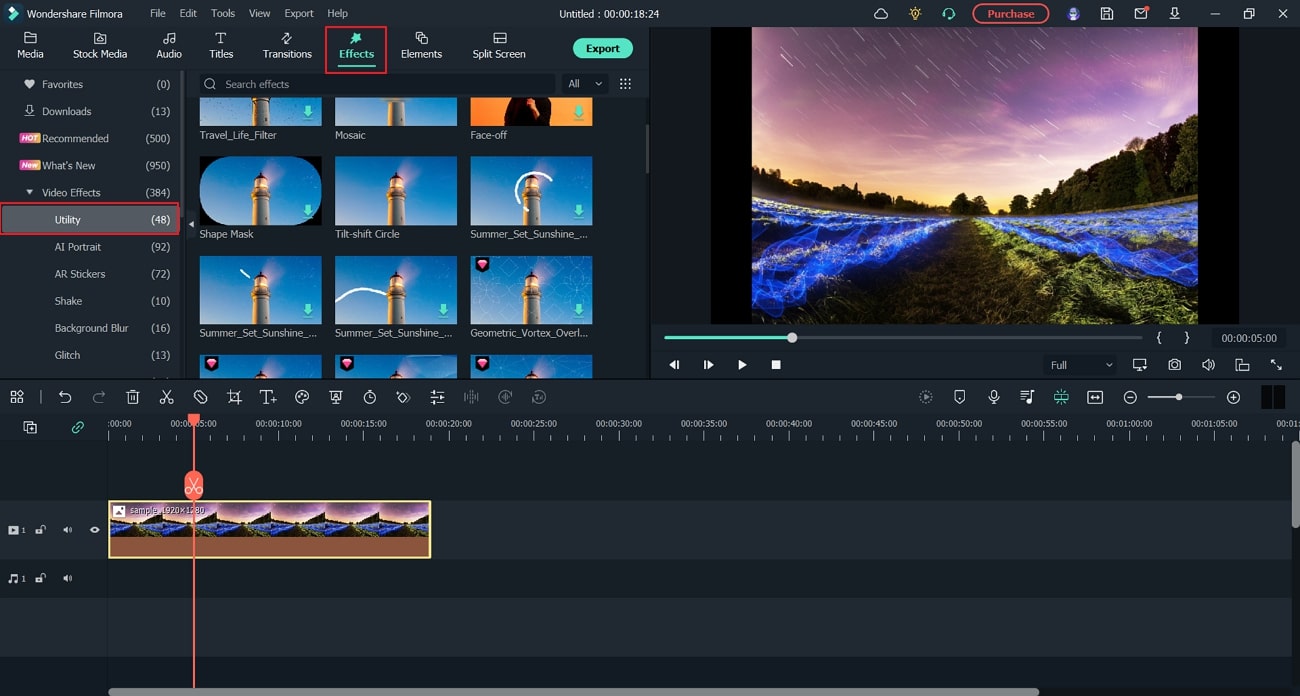
Drag and drop the photo in the timeline to proceed. Now go to the Effects tab and tap on the “Video Effects” option. From there, tap on “Utility” to explore multiple effects. Here, there are three blur effects that you can utilize: Mosaic, Tilt-shift Circle, and Tilt-shift Linear.
Step 3 Adjust the Blur Settings
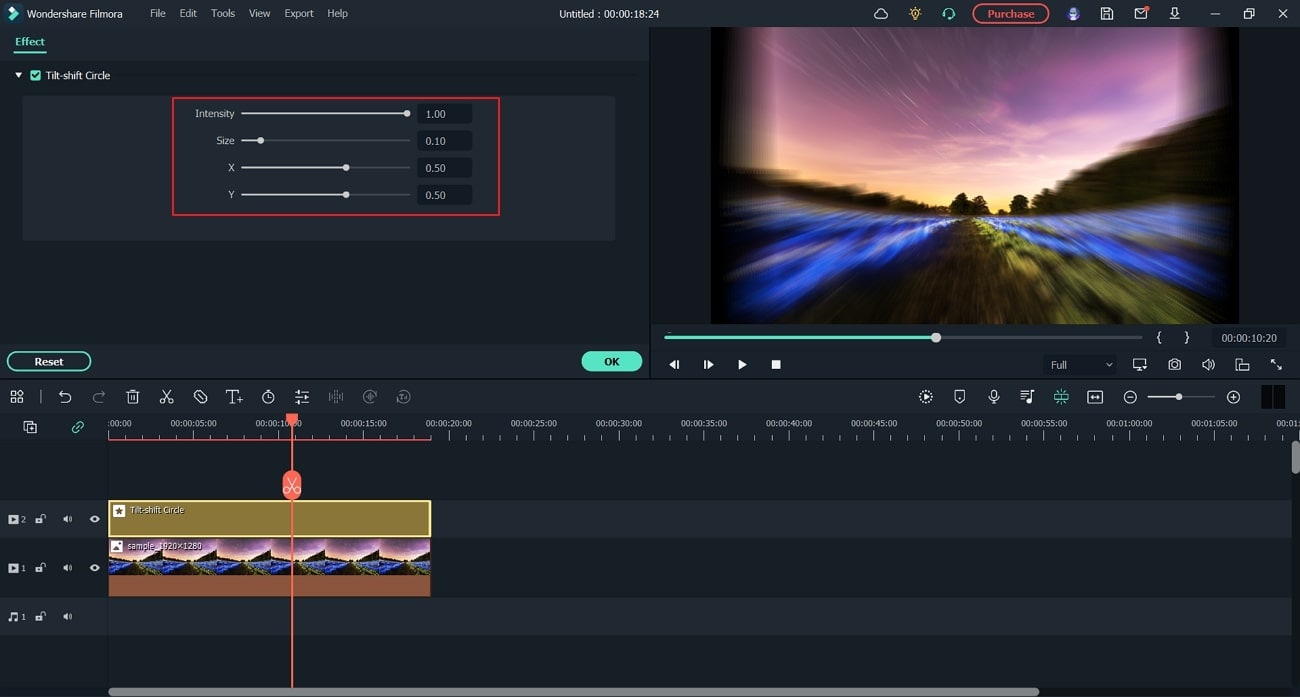
Choose your preferred effect and drop it into the timeline. Now increase the duration of your effect according to the clip. Once done, double-click on the effect to open its properties. Here, you can adjust the size, intensity, and other elements of the blur effect.

WPS Office Premium ( File Recovery, Photo Scanning, Convert PDF)–Yearly
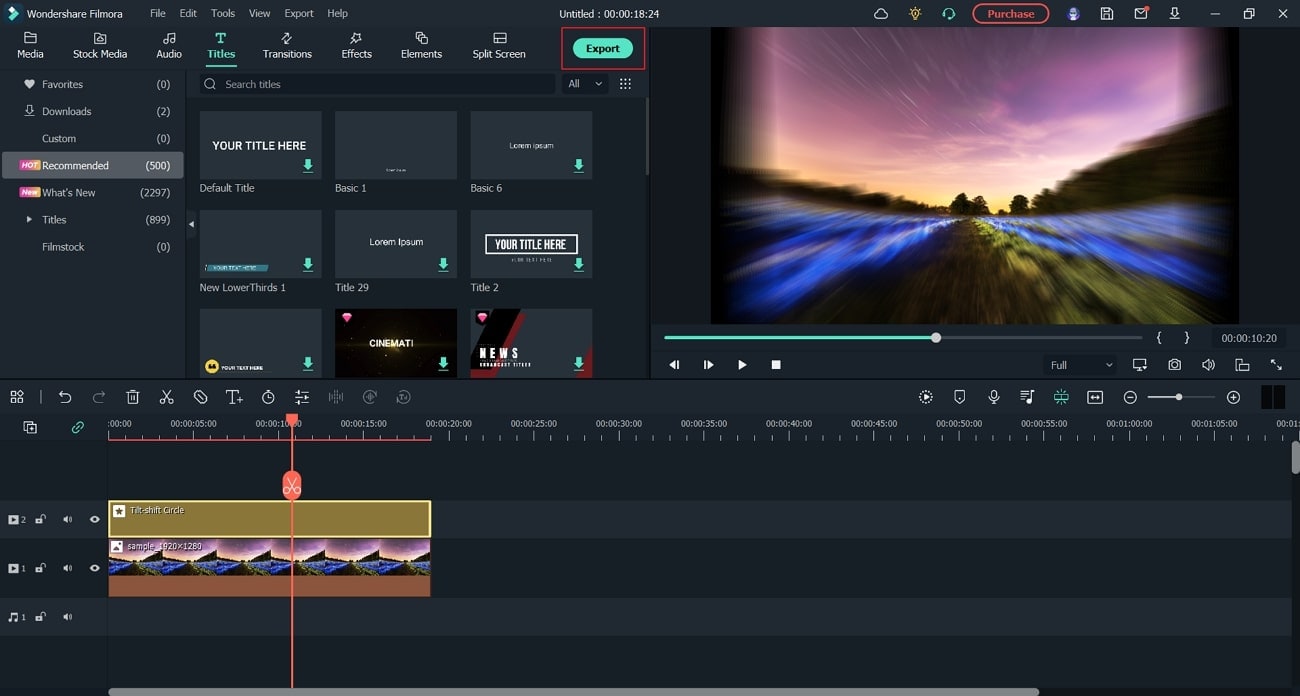
Step 4 Edit the Clip
You can also edit the clip by adding titles or more effects. Once done with the edits, hit the “Export” button given on top.
Conclusion
Many photographers and professionals apply different techniques or effects to enhance their photos. One of the trending effects that can add an artistic element to the fast-moving objects in your photos is the radial blur effect. This effect can bring attention and focus to your photos.
By reading this article, you have learned how to add a radial blur effect using Adobe Photoshop. Also, we have recommended Filmora as the best alternative to Photoshop.
Free Download For macOS 10.14 or later
For photo and video editing, Filmora provides several features such as Split Screen, Speed Ramping, Auto Reframe, Motion Tracking, etc. To capture your on-screen activities or video meetings, this tool also provides you with a Screen Recorder.
When it comes to effects, Filmora provides tons of vibrant effects such as Boris FX, Chroma Key, Mask and Blend, NewBlue FX, etc. Besides being a great photo and video editor, you can use this platform to edit and alter audio clips.
Steps to Create Radial Blur Effect Using Filmora
Creating a radial blur effect in Filmora is extremely simple and easy. Its intuitive interface allows you to add a radial blur effect instantly with a few clicks. For your convenience, we have mentioned precise and authentic instructions below to create a radial blur effect in Filmora:
Step 1 Add your Photo
Begin by launching Wondershare Filmora on your PC. Afterward, tap on the “Create New Project” button to open a new window. Hit the “Arrow” button and import the photo into the project media.
Step 2 Add the Required Effect
Drag and drop the photo in the timeline to proceed. Now go to the Effects tab and tap on the “Video Effects” option. From there, tap on “Utility” to explore multiple effects. Here, there are three blur effects that you can utilize: Mosaic, Tilt-shift Circle, and Tilt-shift Linear.

Step 3 Adjust the Blur Settings
Choose your preferred effect and drop it into the timeline. Now increase the duration of your effect according to the clip. Once done, double-click on the effect to open its properties. Here, you can adjust the size, intensity, and other elements of the blur effect.
Step 4 Edit the Clip
You can also edit the clip by adding titles or more effects. Once done with the edits, hit the “Export” button given on top.
Conclusion
Many photographers and professionals apply different techniques or effects to enhance their photos. One of the trending effects that can add an artistic element to the fast-moving objects in your photos is the radial blur effect. This effect can bring attention and focus to your photos.
By reading this article, you have learned how to add a radial blur effect using Adobe Photoshop. Also, we have recommended Filmora as the best alternative to Photoshop.
- Title: In 2024, Impart Rotational Luminosity Modification in Photoshopping
- Author: Jeffrey
- Created at : 2024-08-21 07:36:24
- Updated at : 2024-08-22 07:36:24
- Link: https://some-knowledge.techidaily.com/in-2024-impart-rotational-luminosity-modification-in-photoshopping/
- License: This work is licensed under CC BY-NC-SA 4.0.