![[Updated] FL Studio's Approach to Cautious Sound Dimming](https://thmb.techidaily.com/f5d1594082aca6452dbc25a49388a37fc7e84721f123ecd76572cb92530c4365.jpg)
[Updated] FL Studio's Approach to Cautious Sound Dimming
FL Studio’s Approach to Cautious Sound Dimming
Fruity loop studio, also known as FL Studio is a digital audio workstation (DAW) that is one of the best platforms for those who want to learn music production. People who compose audio and produce music mostly prefer FL Studio. It does not matter whether you are an advanced learner in music production or not, you can quickly learn about this as a beginner also. You have to purchase for FL Studio. However, you can try the free trial to get an overview of FL Studio.
There are many features available in FL Studio which help for recording purposes or live performance. You can record your audio to your mac or pc at very ease. It has become a powerful tool for music producers and DJs. Image-Line provides us with another crucial feature for creating professional music. It gives you a clear sound with HD sound for its 64-bit architecture. There is another feature called Delay compensation which creates a fantastic mix without overloading the CPU.

Part 1. Steps to Fade Audio with FL Studio
You can create and record the sound of different musical instruments like guitar, drums, and many more. Also, it gives us high-quality audio and a clear audio recording. It also does detailed audio editing. Here you can cut your audio, trim your audio, copy your audio, fade the audio, and many more. If you want to be more creative and do detailed work, you should get this software.
It can create new sounds through drum machines as a result you can show your creativity to a greater level. FL Studio also provides multiple effects for processing and transforming sound. If you want a smooth transition in increasing and decreasing the volume, then fading plays a major role in every aspect. It is a crucial skill that every musician or music producer should pursue. So, let’s discuss the steps on how to fade audio in FL:
Step1 The first and foremost task to do is the successful installation of FL Studio. Getting the latest version of this will be useful for you as it has a lot of new features.
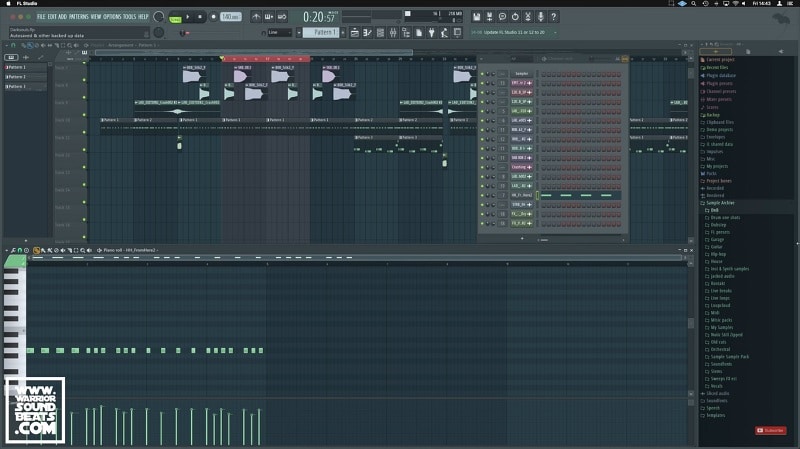
Step2 Open your FL Studio window on your pc or mac. Then, choose the right volume parameter for the creation of automation in your FL studio. You can do it using the mixer channel method.
Step3 After getting the volume parameter, now you will need to create automation. For this, you will have to click right in the volume layer and then tap on ‘Create Automation Clip’.
 Allavsoft Batch Download Online Videos, Music Offline to MP4, MP3, MOV, etc format
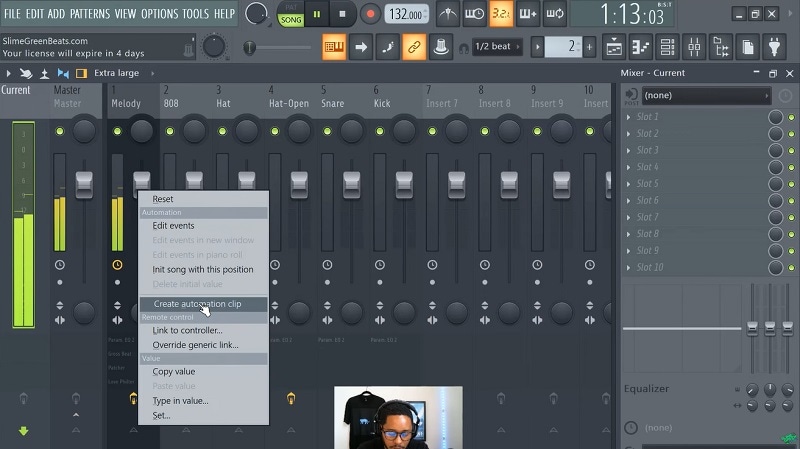
After selecting that, there will be an addition of a new automation clip to the playlist.
Step4 Due to the automation clip, you will be able to do a smooth transition in and out of that song or audio. Now, you can create a suitable volume for fading your sound. If you want to create another new automation, then click on the right. After that click on the left and drag it.
Part 2. FL Studio Alternative to Fade Audio
If you have the latest version of FL i.e., FL Studio 20, then it will allow you for multiple recordings. For this, you just have to build a looped region and then tap on ‘Record’. Now it will create new tracks of its own when it reaches the end region of the loop.
However, if you are looking forward to the alternative option for FL Studio, Filmora can be a perfect substitute for this. As Filmora has a lot of features that are easy to use and has multiple editing tips, Wondershare Filmora is the best option for audio editors. Moving ahead, we will now learn how to fade in and fade out in Filmora:
Free Download For Win 7 or later(64-bit)
Free Download For macOS 10.14 or later
Step1 The first thing you have to do is successfully install the Filmora software on your pc or mac. Before fading audio, you should have some basic knowledge about the keyframes. After creating the audio keyframes, you will see an audio panel like the below surface.
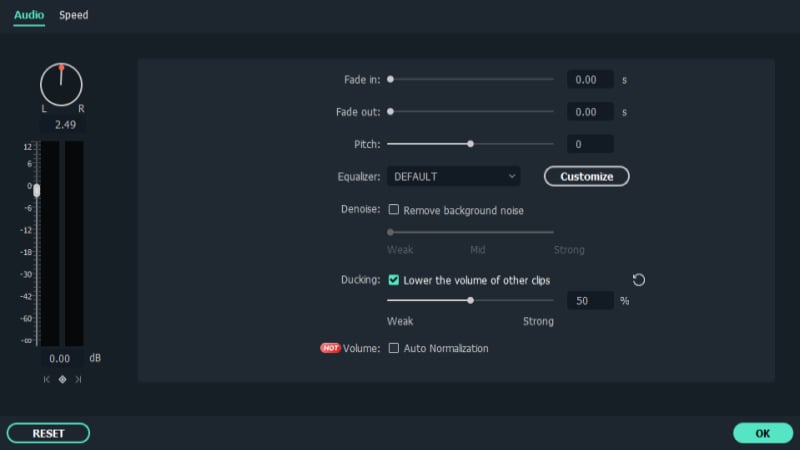
Step2 To fade audio in, you have to go to the audio setting. Then drag the pointer to the fade-in option which is present on the right and then apply the duration.

Step3 If you want your audio to fade out, again go to the audio setting. Then drag the pointer to the fade-out option. Now set your duration and see the fade-out effect.
No matter which audio editing software, what matters is the learning outcome. Learn the features of different editing software and choose what is suitable for you. If you are a beginner, then watch some tutorial videos on YouTube and read some Quora on google. Those who are just interested in audio editing and want to learn more should first try out Filmora , whereas if you have a basic idea about FL Studio then you can definitely go for it.

Related FAQs of FL Studio Audio Editing
1. How to fade out FL studio mobile?
If you want to fade out your audio in FL on your mobile phone, tap on the waveform icon which is present on the top left side of the audio. It will now open the drop-down menu where you can do automation and then select volume.
If you want to do crescendo in FL Studio, you can apply certain automation on your volume slider and can use that for adding some dynamics. There is another way of doing this by manually changing all the notes’ velocities to the dynamics you want.
3. What is declicking mode FL studio?
Declicking is an option that helps to remove ‘Clicks’ in the beginning or end. But when it comes to FL Studio, the meaning is a bit different. If you need to cut a part of your audio in FL Studio and later there arises a jump between two parts. This is known as declicking mode in FL Studio.
Free Download For macOS 10.14 or later
Step1 The first thing you have to do is successfully install the Filmora software on your pc or mac. Before fading audio, you should have some basic knowledge about the keyframes. After creating the audio keyframes, you will see an audio panel like the below surface.
Step2 To fade audio in, you have to go to the audio setting. Then drag the pointer to the fade-in option which is present on the right and then apply the duration.

Step3 If you want your audio to fade out, again go to the audio setting. Then drag the pointer to the fade-out option. Now set your duration and see the fade-out effect.
No matter which audio editing software, what matters is the learning outcome. Learn the features of different editing software and choose what is suitable for you. If you are a beginner, then watch some tutorial videos on YouTube and read some Quora on google. Those who are just interested in audio editing and want to learn more should first try out Filmora , whereas if you have a basic idea about FL Studio then you can definitely go for it.
Related FAQs of FL Studio Audio Editing
1. How to fade out FL studio mobile?
If you want to fade out your audio in FL on your mobile phone, tap on the waveform icon which is present on the top left side of the audio. It will now open the drop-down menu where you can do automation and then select volume.
2. How to crescendo in FL studio?
If you want to do crescendo in FL Studio, you can apply certain automation on your volume slider and can use that for adding some dynamics. There is another way of doing this by manually changing all the notes’ velocities to the dynamics you want.
3. What is declicking mode FL studio?
Declicking is an option that helps to remove ‘Clicks’ in the beginning or end. But when it comes to FL Studio, the meaning is a bit different. If you need to cut a part of your audio in FL Studio and later there arises a jump between two parts. This is known as declicking mode in FL Studio.
- Title: [Updated] FL Studio's Approach to Cautious Sound Dimming
- Author: Jeffrey
- Created at : 2024-08-21 09:57:47
- Updated at : 2024-08-22 09:57:47
- Link: https://some-knowledge.techidaily.com/updated-fl-studios-approach-to-cautious-sound-dimming/
- License: This work is licensed under CC BY-NC-SA 4.0.